Settle in. This is a long post. Your starter is healthy and ready to work, but the recipes you find are really complicated and a little confusing, am I right? Just like you realized that your writing improves and follows a common progression with an outline, bakers use the same outline for all yeast dough production. And there’s room to improvise or riff in there too— I’ll explain.
But, before you get started, you’ll need some ground rules. Use grams and you and your kids can brush up on math. I noted in an earlier post that bakers understand their formulas by expressing them in percentages— this is really just a simple ratio. I recommend using a recipe written this way as it is an indication that it’s coming from a professional, and also, you will begin to see patterns. DON’T RESIST! The math will set you free, and it’s really easier than it seems.
12 Steps of Yeast Dough Production
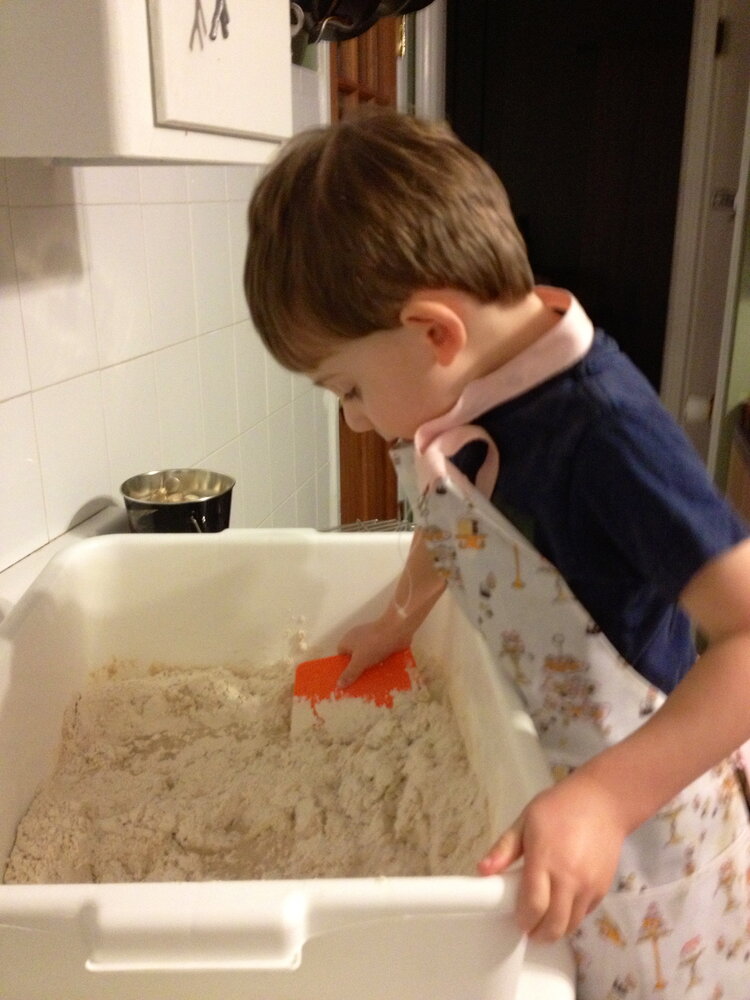
- Scaling Measure your ingredients, accurately, and on a scale.
- Mixing Optional step- autolyse. Here you combine all of your flour and your water together until you have a shaggy mass. Let this mixture sit for 20 minutes or up to a few hours. The gluten will unravel on its own, so less mixing is required. This preserves the carotenoids in your flour, retaining the color, provides a more extensible dough, and it ultimately increases shelf life by not oxidizing the dough. Then add your salt and carry on to true mixing. If you are using a liquid starter, it will need to go into the autolyse so you have enough hydration for your flour. If your starter is added, don’t let the mixture autolyse longer than a half an hour or fermentation will run away from you.
- Fermentation So, technically this is happening until your yeast dies in the baking process, but there is time set aside just to let the yeast do its thing. What’s happening here? Yeast is converting complex carbohydrates into simpler ones. Like college students, it’s all about binging and reproducing. It’s gobbling up these sugars (which enzymes are breaking into small units so the yeast can consume it), and it’s expelling gas (carbon dioxide for lift) and alcohol (flavor). Its spores are also budding and splitting, creating more units of yeast.
- Folding
- Dividing Here’s where you cut your dough into specified weights. Use your scale!
- Preshape Gently guide the closer to its final shape. This is an important opportunity to realign the gluten, so it can trap that carbon dioxide. Does your dough feel sticky? It’s likely because you are tearing the gluten and allowing the water the protein had been holding to leach out. Don’t do that! use a gentle touch.
- Bench Rest You’ve done a lot to the dough in the last few steps. Back off! Leave your preshaped dough on a lightly floured surface, and cover it so a skin doesn’t form. You can use plastic wrap, but that never ever decomposes, so maybe use a tea towel instead, or reserve a sheet of plastic that you use over and over for this purpose. Just saying. Anyway, this step lasts 10-30 minutes, depending on how your dough is feeling. If it springs back during the next step, give it a longer break.
- Final Shaping Put the dough in the shape you intend it to be. I’ll get some process pictures for this to update later.. Once the dough is shaped, you will put it between cloth (called couche, but you can use a tea towel) or in a basket (called a banneton or brotform, you can line a bowl with a tea towel if you don’t have).
- Proofing This is a second designated period where you just let the dough form gas and expand. The length of proof is dependent on the quality of your fermentation. It’s variable, but for my sours, it’s usually 2-2.5 hours. I can check if it’s done by gently pressing (not poking!) my finger into the side of the loaf. If the impression holds, it’s done proofing. Keep the dough covered during this period.
- Baking Lots happens now. In lean doughs, you will need to score the dough. This cutting or slashing (which is only called scoring) allows CO2 to escape through predictable places. It’s also the baker’s signature. Use a razor (bakers use razors called lames) and cut quickly and decisively. As a rule, you want to have a balance across the surface in your cuts so the dough can open uniformly.
- Cooling Yeah, you can’t eat it yet. In fact, this step is critical to producing good bread. Let it cool, with good air circulation. Alcohol dissipates, the crumb sets, and your flavor from the crust gets pulled back into the loaf due to osmotic pressure. Don’t cut your hot loaf! Give it at least two hours to cool. Seriously. Some loaves “cure” for a few days before cutting.
- Storage Store your loaf in a brown paper bag at room temperature, or wrap in a clean tea towel. No plastic. What would happen if I wrapped you in plastic? You’d get sweaty, right? Lean doughs will never mold, unless you abuse them by putting them in a plastic bag, where the moisture it releases during the natural staling process, is trapped, creating mold. Gross. At room temp and in something breathable, it will merely dry in the days to come.
You can mix by hand or by mixer.
If you are mixing by machine, put your water on the bottom first. Add your starter (don’t forget to save some so you can bake again), flour(s) and salt.The goal of mixing is to distribute ingredients, develop the gluten, and bring the dough to the appropriate temperature (73-76○F is common for lean doughs). I’ll talk about how you achieve that in another post. Your mixed dough should not look like taffy. In fact, the more you mix, the tighter your interior crumb structure will be. It’s better to gain strength to your dough through fermentation and folding. Put your dough in a lightly oiled or a wet bin. Cover it and keep it someplace between 70-75 degrees.
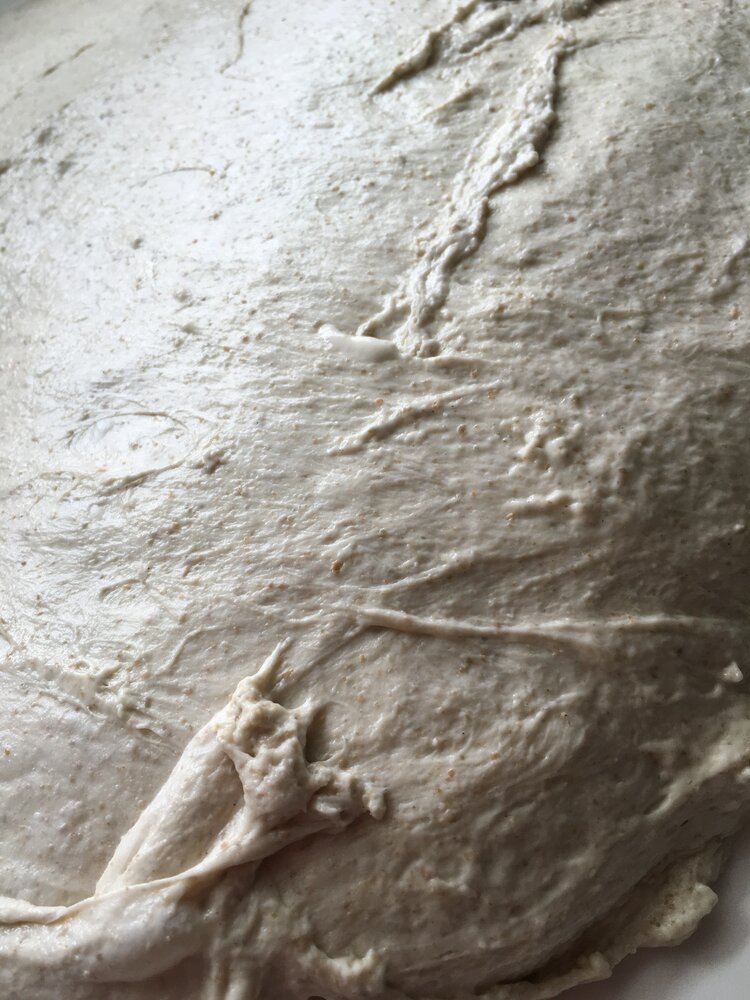
You can see the gnarls of gluten
in this just mixed dough
It’s better to develop the dough through our next step, folding.
also called stretch and fold, or sometimes punching. Please don’t punch this dough you’ve so lovingly created. It’s alive, right? We all do better with gentle guidance. So, intermittently, you are going to stretch and fold the dough. This realigns the gluten strands, so they can lengthen and trap more gas. It also evens the temperature in the dough tub.
Some tips, wet your hands and the dough will not stick to them. When you pick your dough up, think of lifting a cat under it’s arms. It should slump like a cat, allowing the dough to fold over on itself. I’ll post some video of this later. How many folds? Depends on the strength of the dough, which you will learn through practice. More folds means more strength, so there is too much of a good thing. I fold my sourdoughs roughly every 50-60 minutes.
I try to keep my dough
as uniform as possible
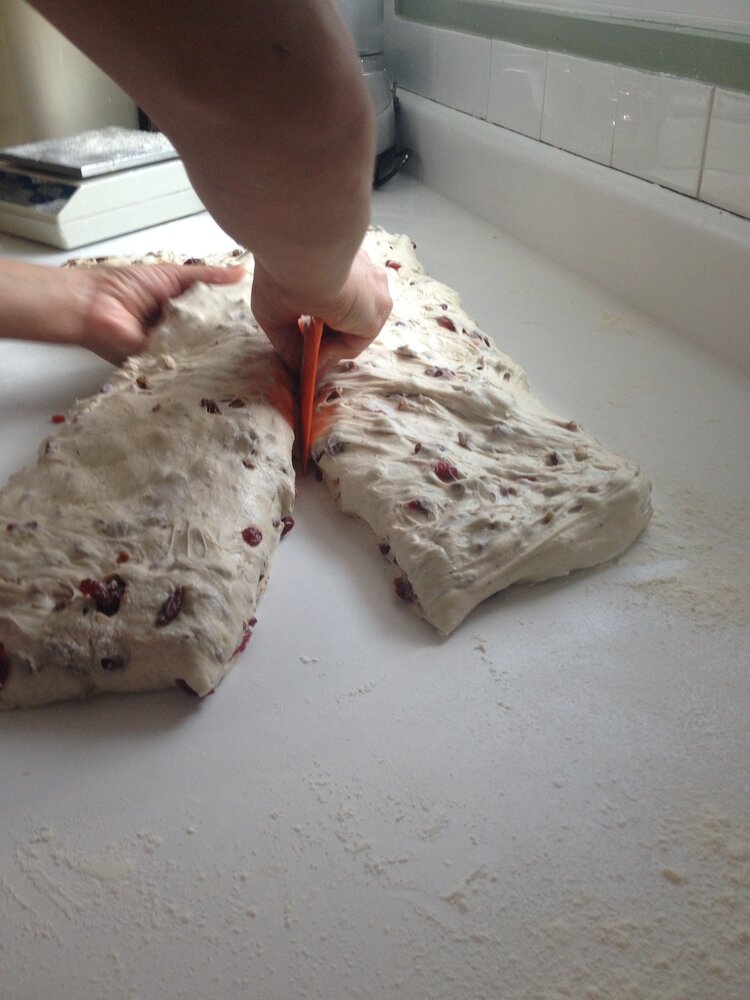
Water or flour your work bench before stretching your dough into an even rectangle. Cut decisively with a bench scraper or knife.
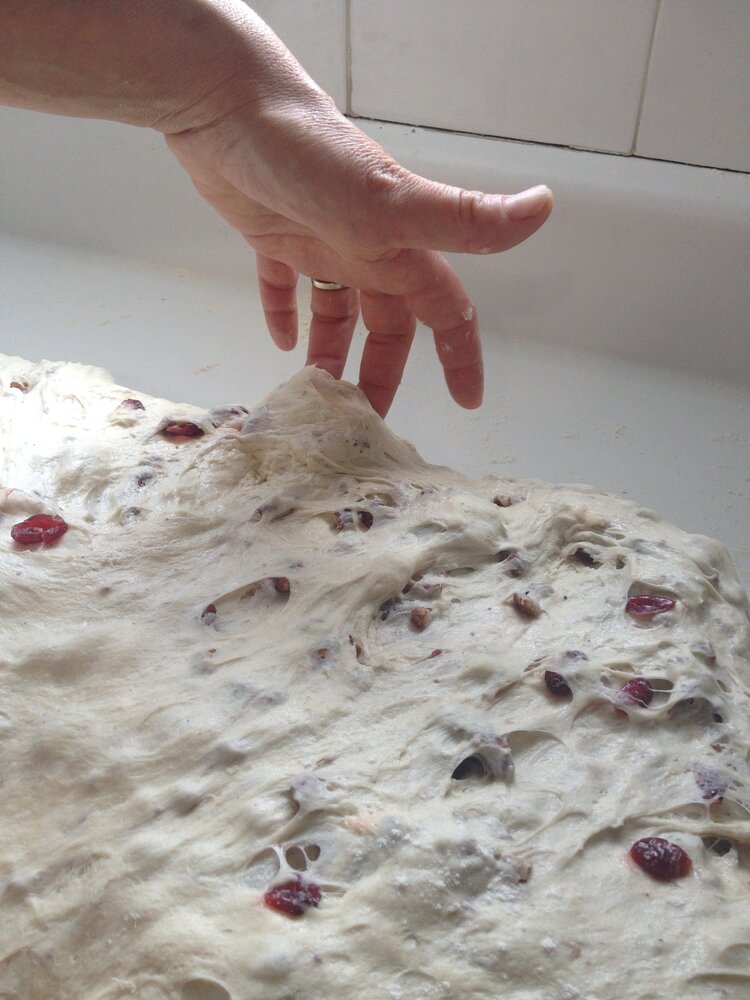
Think about using the
flat pads of your fingers
when you handle your dough.
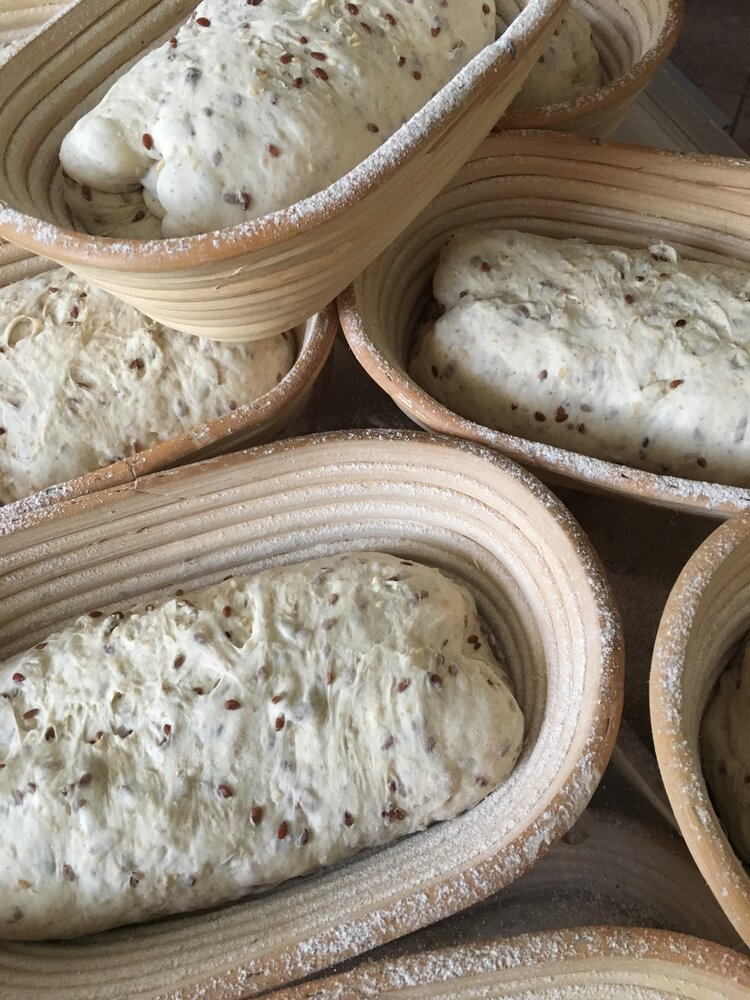
Loaves in brotform
These willow baskets are dusted with rice flour and wheat flour to keep them from sticking, and add a design.
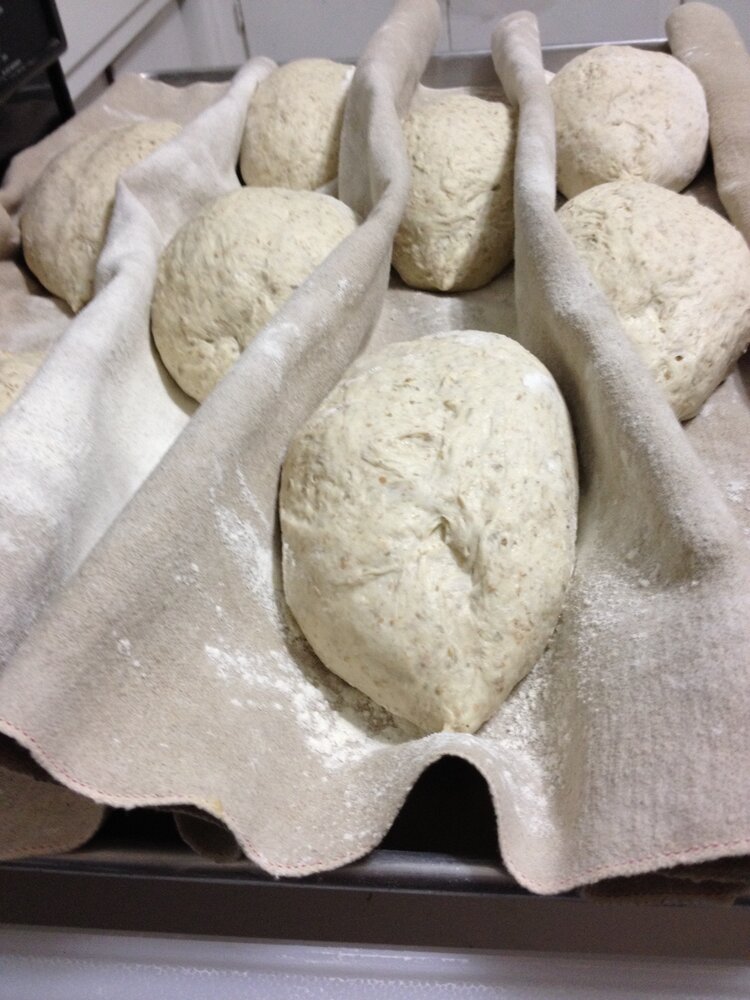
Bâtards on couche
This cloth keeps the dough from sticking to each other, and the loaves snuggle together to help keep their shape.
optional step: Retarding- So, at this point, you can cover the dough and chill it in your refrigerator for 8-12 hours. This allows you to take a nap and manage your schedule for convenience, and it gives the dough time to ferment slowly. Doughs that have been retarded often have blisters on the surface (called fish eyes), that Americans love.
Is your oven preheated? Good. You’ll want to bake between 450-480○F. Lots of home bakers are using Dutch ovens to bake. It’s a fantastic solution. I like the Challenger Breadware Pan, but if you have a Dutch oven, that works well. If you are baking this way, score your bread and load into your hot oven. Otherwise, you can jerry-rig your oven a bunch of ways! You can put firebricks or quarry tile on the bottom RACK of your oven, and load your scored loaf on there. The problem is you’ll need steam. In a Dutch oven, the steam is trapped around the loaf by the lid. If you’re reproducing a hearth with stone, I suggest you boil 1/4 of water and pour it onto a pan on the floor of your oven just before loading your scored loaf. Do not pour water or ice on the floor of your oven, unless you are looking for an excuse to buy a new oven. You’ll ultimately warp the floor of your oven. Just don’t.
Why steam? It offsets crust formation, allowing the dough to fully expand. Also, it creates the necessary conditions for Maillard, so your loaf will caramelize beautifully. It’s critically important for your success. Remove the lid of the Dutch oven, or crack the oven door and take out the pan (to be sure there is no extra steam) for the last third of your bake. This allows the crust to firm. Determine doneness first by time, second by color, and lastly by knocking on the bottom of the loaf. It should sound hollow.
Your dough will enjoy the largest rise during the baking process. This is called oven spring. We can talk about what happens during this process at a later date.
Cool it on a rack. If you leave it on your countertop or in a pan, it will condensate and get soggy.
And yes, you can freeze it. In this case, you would wrap it in plastic to protect it just before freezing. Defrost completely and then revive at 400○ for 7-10 minutes before serving.